
Webflow has become a go-to platform for businesses and designers who need flexible, no-code website development. If you're working with a Webflow design agency, you might wonder how collaborators can access your Webflow project to make updates, edits, or improvements efficiently. Here’s a step-by-step guide on how collaborators can access and contribute to your Webflow site seamlessly.
Understanding Webflow User Roles
Webflow provides different user roles with varying levels of permissions to ensure secure collaboration. These include:
- Owner – Has full control over the project and billing.
- Admin – Can manage team members and project settings.
- Editor – Can modify site content without altering design structures.
- Designer – Can edit both design and content, depending on permissions granted by the owner.
When working with a Webflow design agency, it's crucial to assign the right role to each collaborator based on their responsibilities.
Granting Access to Collaborators
To allow a collaborator to make changes in Webflow, follow these steps:
For Site Editing (Webflow Editor Access)
If a team member needs access to update content like text, images, and blog posts without changing the design, Webflow Editor is the best option.
- Log into Webflow and open the project.
- Click on Project Settings > Editor.
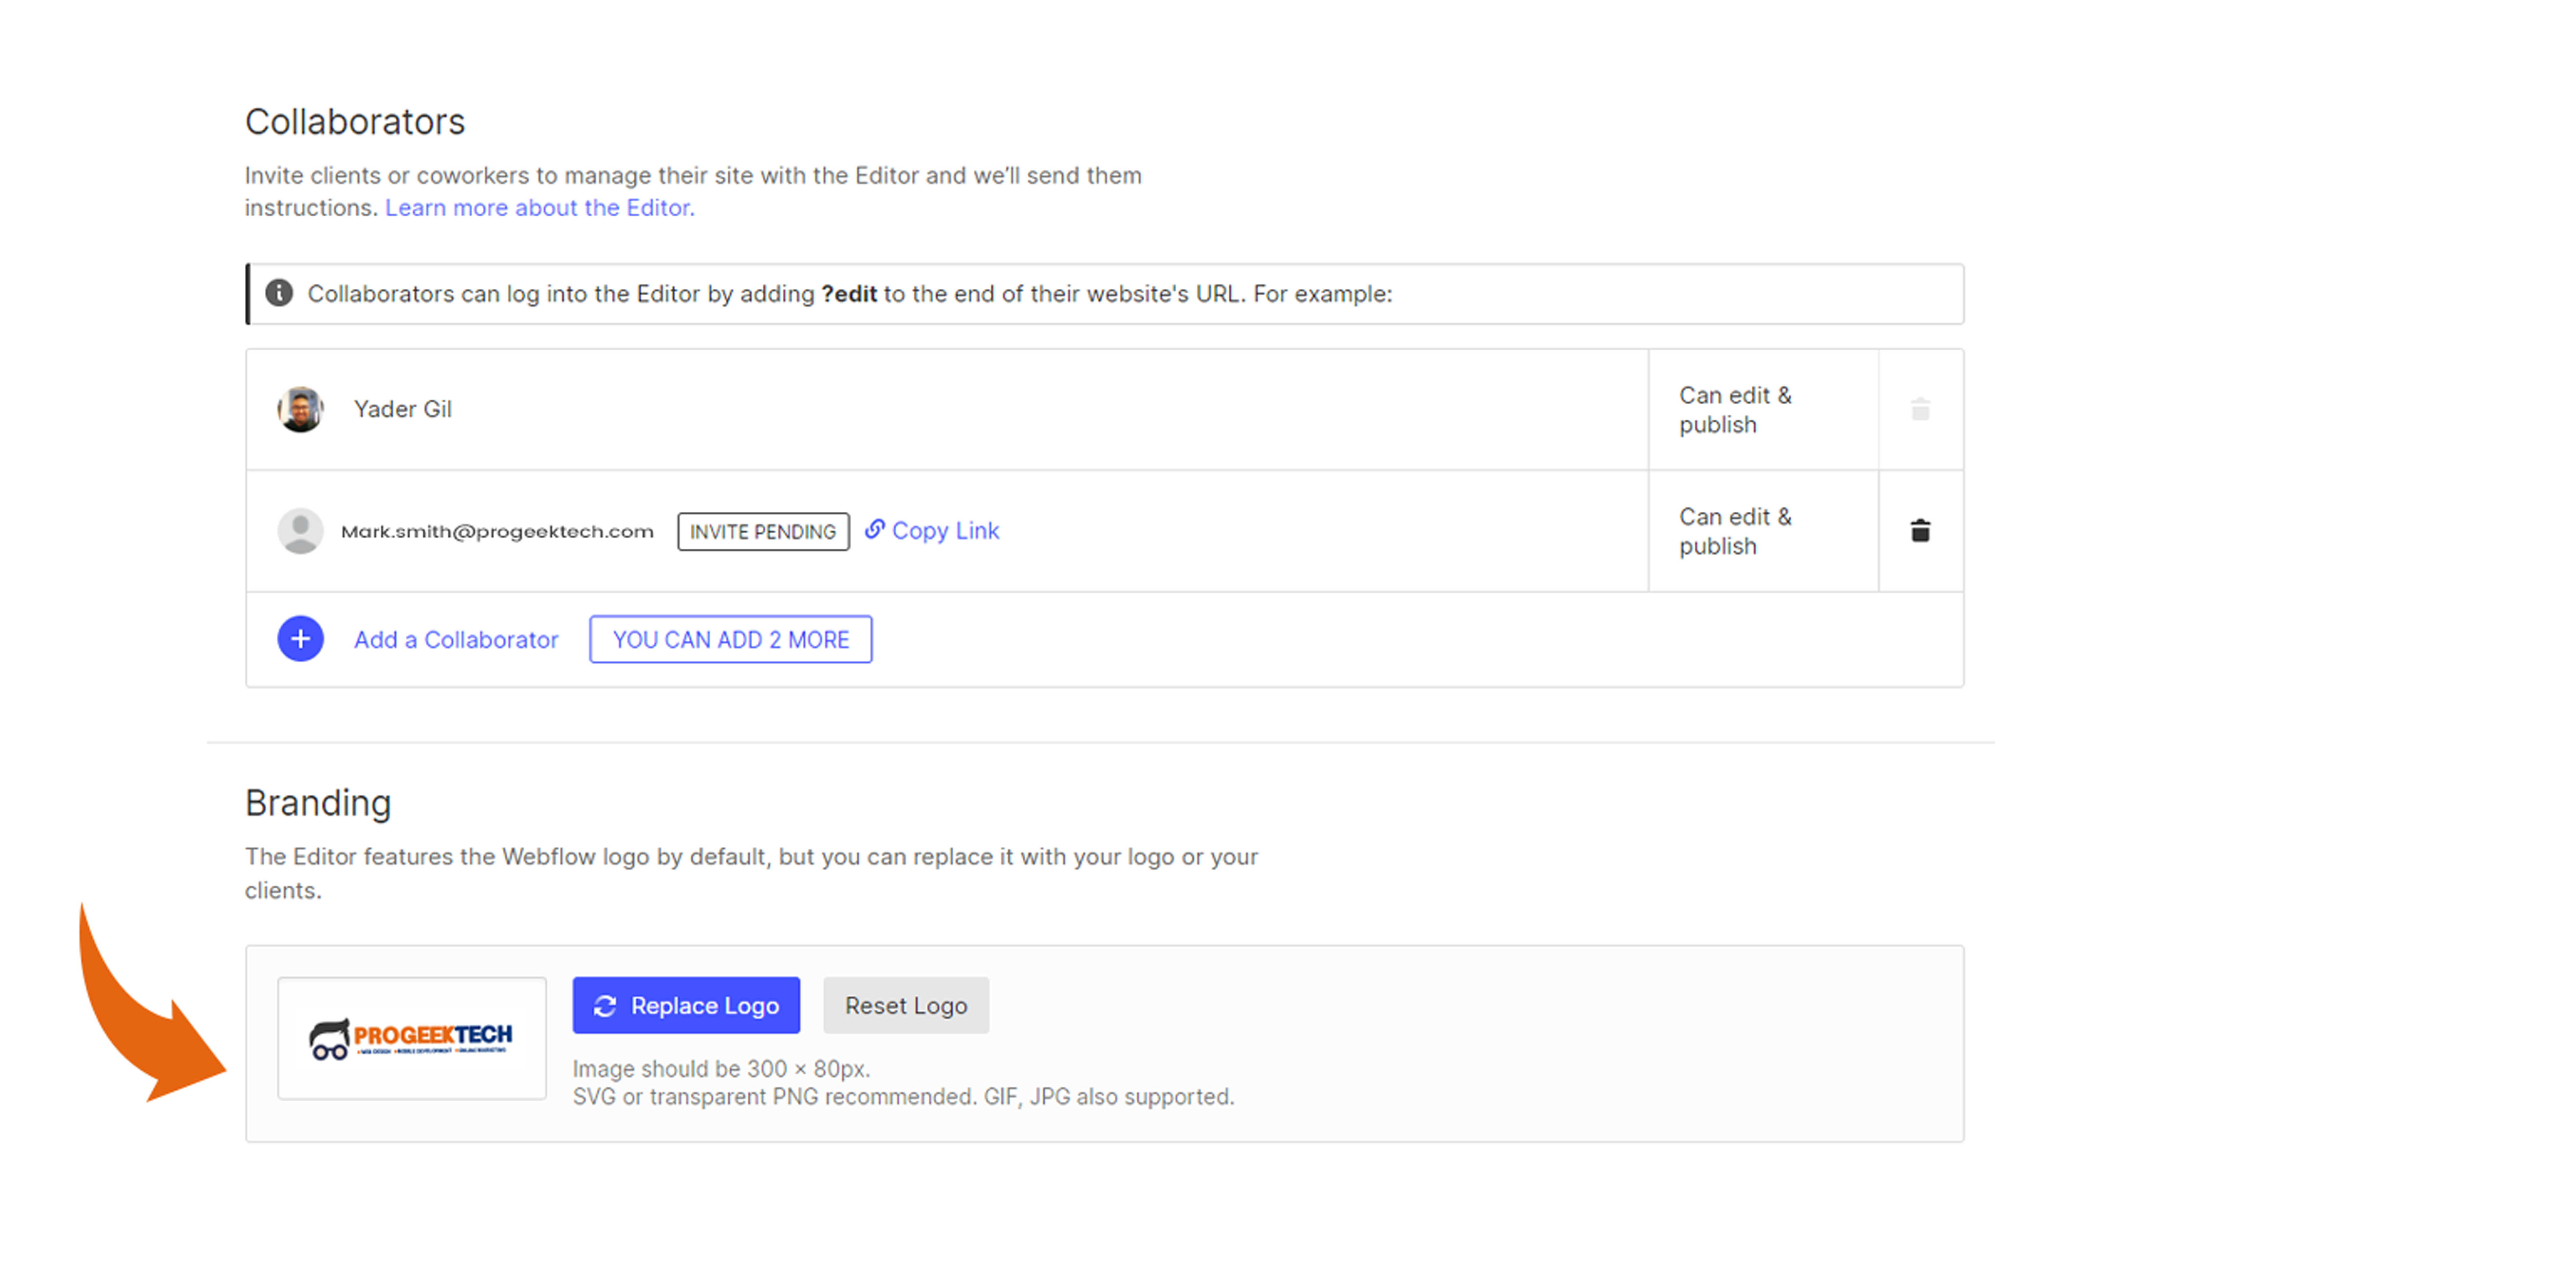
- Add the collaborator’s email under Invite Collaborators.
- The invited user will receive an email with a link to access the Webflow Editor.
For Design and Structure Changes (Webflow Designer Access)
If a collaborator needs full design access, they must be added as a team member in Webflow Designer.
- Go to Project Settings.
- Navigate to Team and click Invite Team Members.
- Enter the collaborator’s email and assign them the appropriate role (Admin or Designer).
- Click Send Invitation.
- Once they accept the invite, they can start making changes in the Designer view.
Collaborating Effectively in Webflow
A Webflow design agency can help streamline collaboration by setting clear workflows and permissions. Here are some best practices:
- Use Webflow’s Staging Feature – Publish updates to the staging site before making them live.
- Enable Version Control – Webflow automatically saves previous versions, allowing easy rollbacks.
- Communicate Using Comments – Webflow’s built-in commenting feature enables clear communication on design elements.
- Limit Unnecessary Access – Assign roles carefully to avoid accidental changes to critical site components.
Troubleshooting Access Issues
If a collaborator faces difficulty accessing the project, check for:
- Pending Invitations – Ensure they’ve accepted the invite from Webflow.
- Browser Compatibility – Webflow works best on Chrome; ensure they’re using a supported browser.
- Role Limitations – Verify their assigned role grants the necessary permissions.
- Billing Restrictions – Some Webflow plans have user limits; upgrade if necessary.
Conclusion
Working with a Webflow design agency makes website collaboration efficient and professional. By understanding Webflow’s access structure and permissions, your team can smoothly update and improve your website without unnecessary roadblocks. Whether you need a content update or a full design overhaul, ensuring the right people have the right access is key to maintaining a well-functioning Webflow project.
Need expert Webflow help? Contact us here at Progeektech today to optimize your website’s collaboration and performance!